How to Crochet
Basic Stitches
- Chain
- Slip Stitch
- Single Crochet
- Half Double Crochet
- Double Crochet
- Treble Crochet
- Increase
- Decrease
Starting a Project
Finishing a Project
Basic Stitches
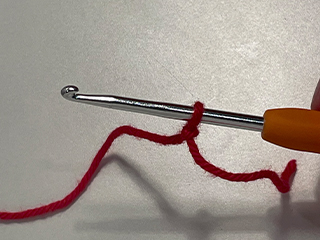
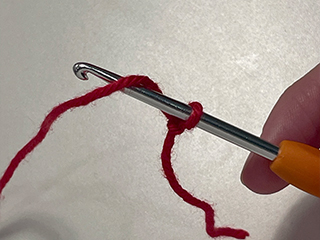
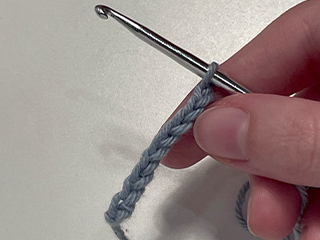
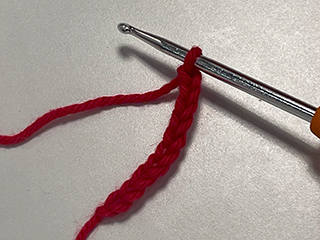
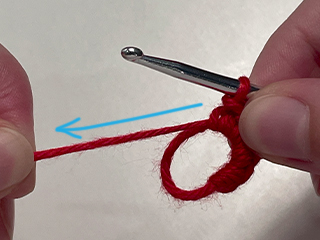
Chain
Abbreviation: ch
A chain will be the foundation for most projects, and is the easiest stitch to make.
Starting with a loop on your hook (slip knot), wrap the yarn over the top of your hook, then pull it through the loop.

Slip Stitch
Abbreviation: slst
A slip stitch is typically used to connect one end of a chain to another, and to neatly finish off a piece.
Insert your hook into the stitch below, wrap the yarn over the top of your hook, and pull through both the stitch and the loop on your hook.
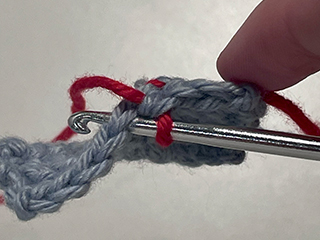
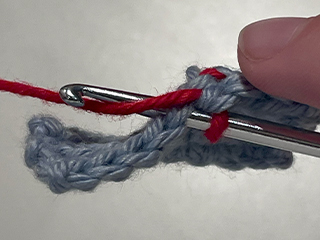
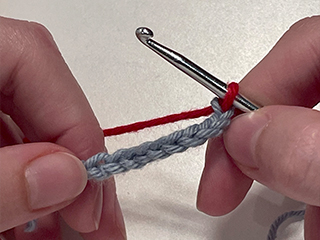
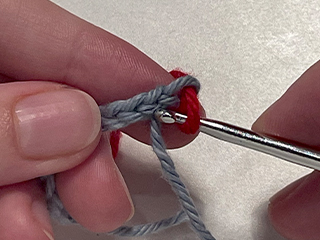
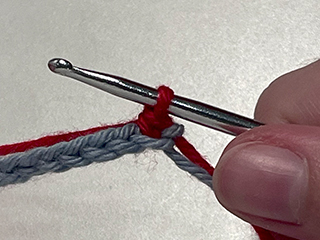
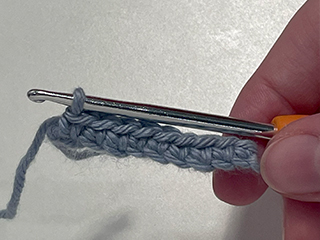
Single Crochet
Abbreviation: sc
A single crochet is the foundation building block of crochet. It is a versitile stitch used in all areas of crochet. It is a tight stitch that results in a stiff fabric, best for making amigurumi and tapestries.
Insert your hook into the stitch below, wrap the yarn over the top of your hook, pull trough the stitch. Wrap the yarn over your hook again, and pull through the two loops on your hook.
Half Double Crochet
Abbreviation: hdc
The half double crochet is a slightly looser stitch than the single crochet, and between the height of a single crochet and a double crochet. It acts as an inbetween-point between a single crochet and a double crochet.
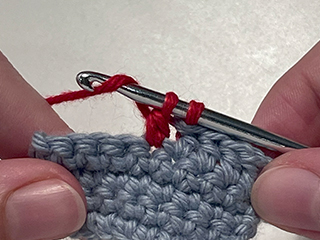
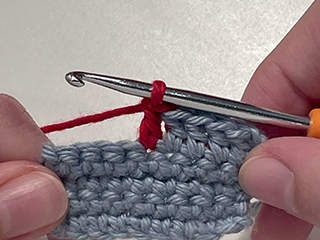
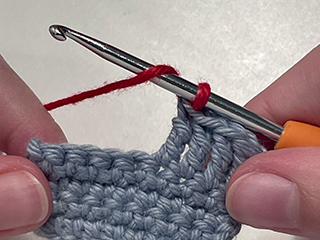
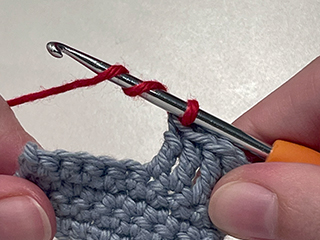
Wrap the yarn over your hook, and insert hook into the stitch below. Wrap yarn over hook, pull through the stitch. Wrap the yarn over your hook again, and pull through all three loops on the hook.
Double Crochet
Abbreviation: dc
The double crochet is a loose stitch that you would probably use the most in wearble pieces and blankets, as it results in a fabric that flows more loosely.
Wrap the yarn over your hook, and insert the hook into the stitch below. Wrap the yarn over the hook, and pull through the stitch. Wrap the yarn over the hook again and pull through the first two loops. Wrap the yarn over your hook once more, and pull through the last two stitches.

Treble Crochet
Abbreviation: tc
The trebel crochet is the tallest stitch you would need in most cases, although you can wrap your yarn around your hook as many times as you please. Treble crochets will have bigger spaces between them, therefore they are not suitable for creating stuffed pieces. They are used similarly to double crochets.
Wrap the yarn over the hook twice. Insert into the stitch below. Wrap the yarn over the hook and pull through the stitch. Wrap the yarn over the hook and pull through the first two loops. Wrap the yarn over the hook and pull through two loops. Wrap the yarn over the hook and pull through the remaining two loops.

Increase
Abbreviation: inc
Increasing is (typically) single crocheting two times in the same stitch. It's used to add more stitches into a row to make it wider than the one below. You can increase with any stitch, not just single crochet. So when a patern calls for an increase, check if it specifies which stitch to use, or deduce using the context of the pattern around.
Create one single crochet as you would normally. Instead of inserting your hook into the next stitch below, insert it into the same stitch as the previous one, and single crochet as normal.
Decrease
Abbreviation: dec
A decrease is when you crochet two stitches together to give the row one less stitch than the row before. It's used to make the row shorter than the one before. There is two methods of deacreasing: crocheting 2 together, and the invisible decrase.
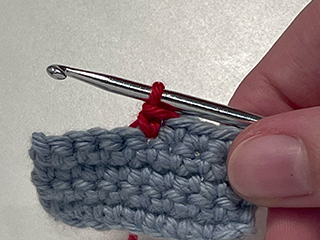
Crocheting 2 Together
Abbreviation: _2tog (sc2tog, hdc2tog, dc2tog, tc2tog)
This method is typically used when both sides of the fabric will be seen. I will be giving the example using a sc, although it can be applied to any of the other stitches.
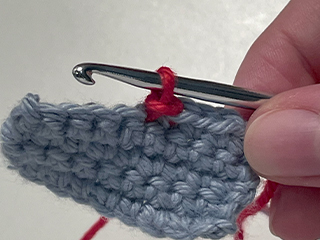
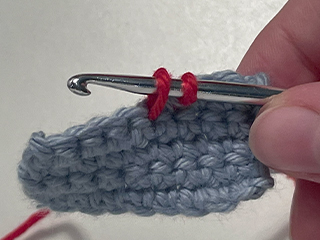
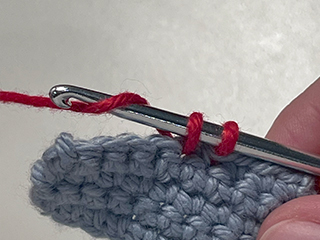
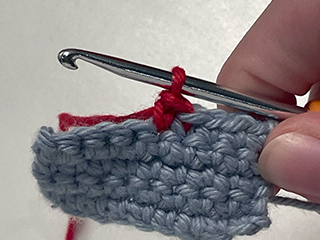
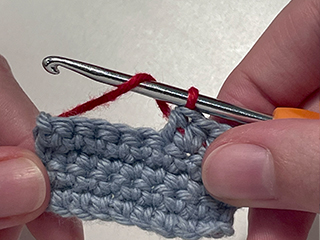
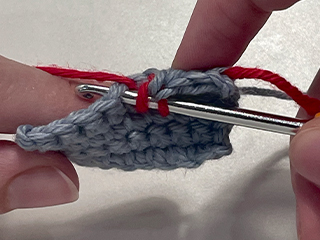
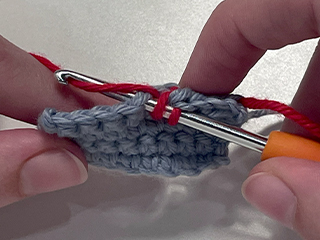
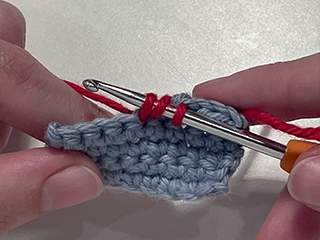
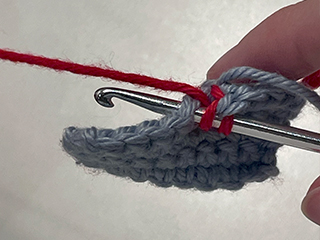
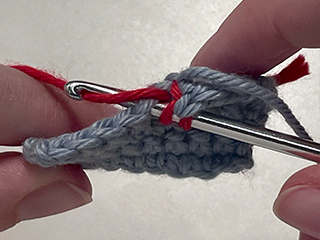
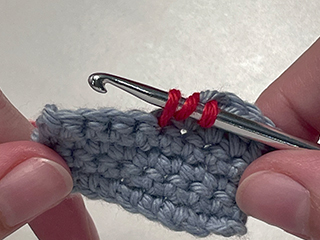
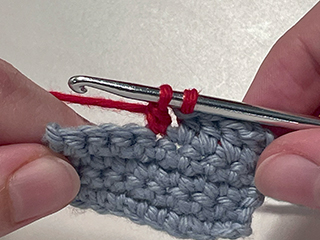
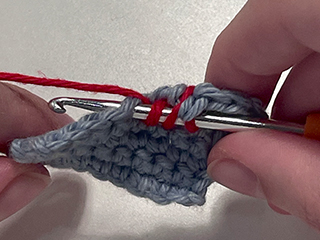
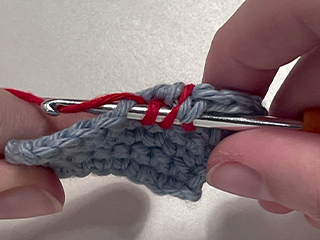
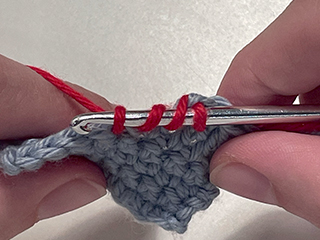
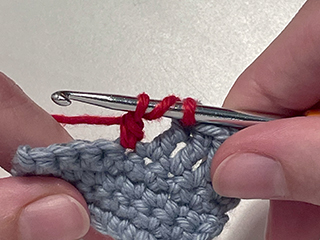
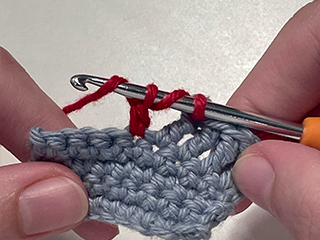
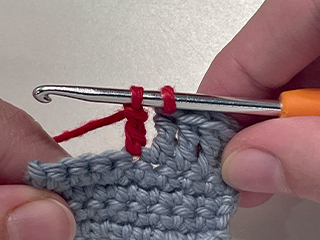
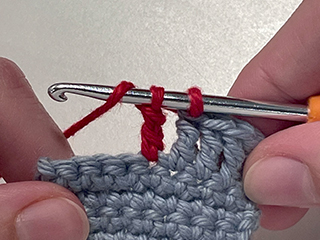
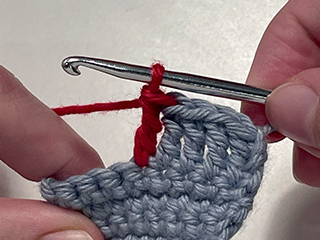
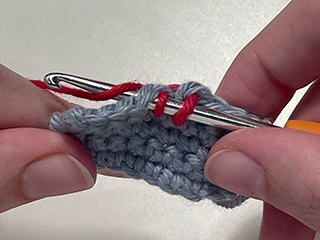
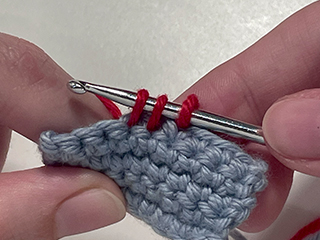
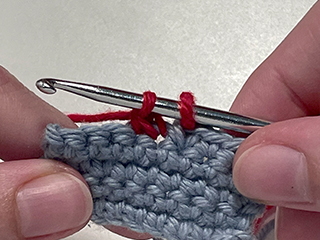
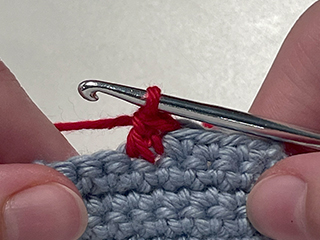
Insert the hook into the stitch below, wrap yarn over the hook, and pull through the stitch - like you noramlly would witha single crochet. Now repeat those steps in the next stitch below. Wrap the yarn over the hook and pull through the first two loops. Wrap the yarn over the hook again and pull through the last two loops.
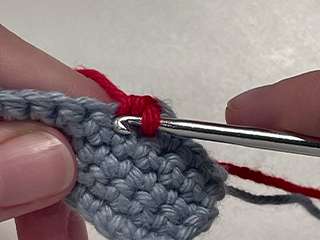
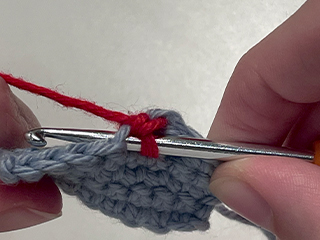
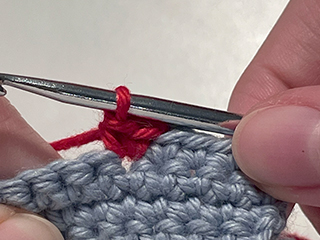
Invisible Decrease
This method is typically used in amigurumi to give it a neater look, whereas the previous method may show gaps.
Insert the hook through the front loop only of the stitch below from underneath, do the same with the next stitch. You should have a total of three loops on your hook. Wrap the yarn over the hook, and pull through the first two loops. Wrap the yarn over the hook again, and pull through the last two loops.
Starting a Project
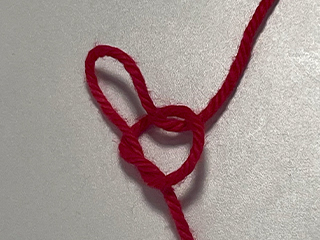
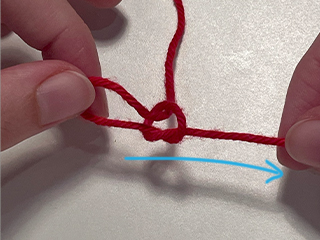
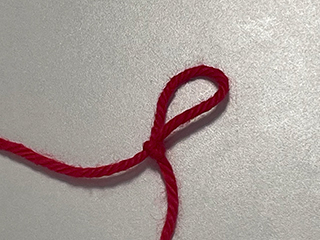
Slip Knot
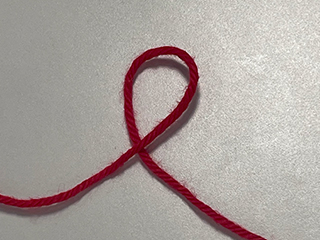
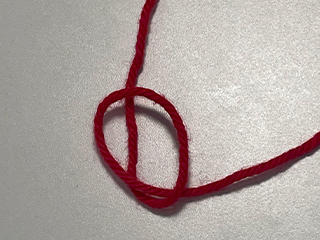
Creating a slip knot is the first step to making a chain.
Make a loop with yout yarn with the end tail underneath (you don't need a hook for this). Grab the tail connected to the skein and wrap it underneath the loop. Pull it through the loop, and pull on the tail end to tighten. Insert your hook into the loop to start your chain.
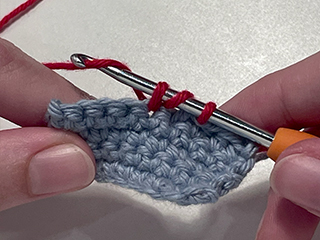
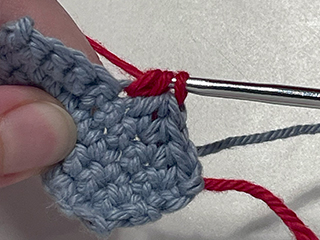
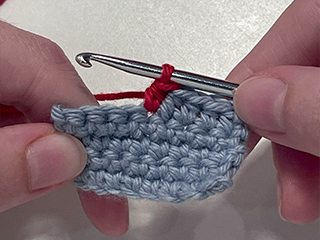
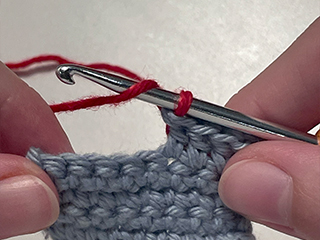
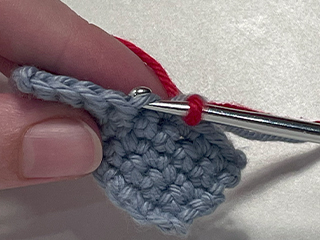
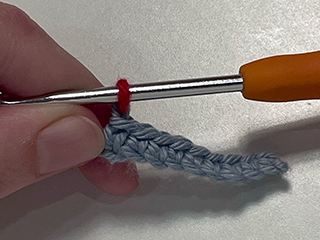
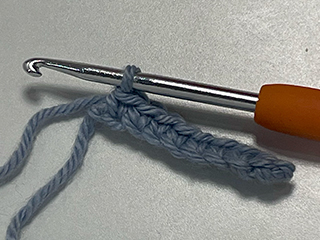
Crocheting into a Chain
Straight Chain
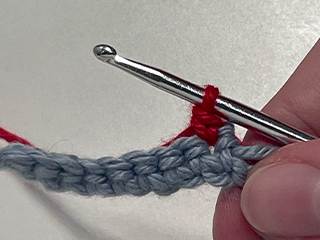
Once you have a foundation chain, to start building from it, add the necessary number of extra chains and skip those chains when starting to crochet the next row.
The amount of extra chains needed depends on which stitch you're using.
- sc = 1 extra chain - start crocheting from 2nd chain from hook
- hdc = 2 extra chains - start crocheting from 3rd chain from hook
- dc = 3 extra chains - start crocheting from 4th chain from hook
- tc = 4 extra chains - start crocheting from 5th chain from hook
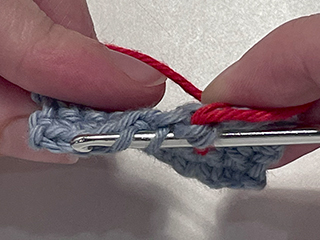
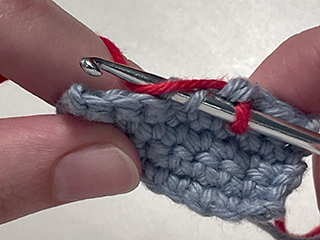
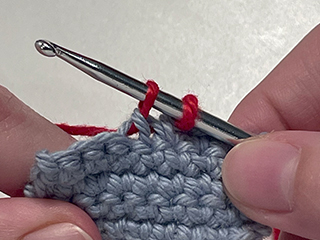
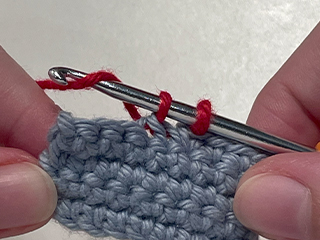
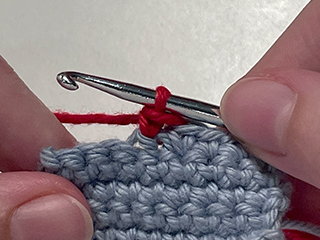
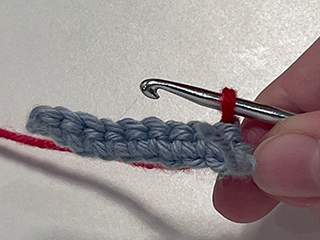
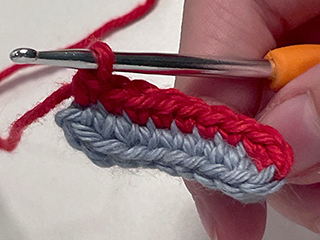
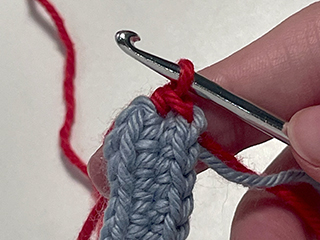
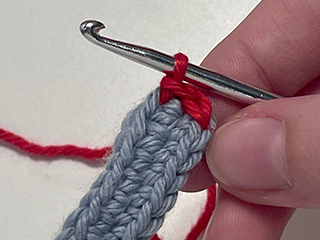
Insert the hook into the chain. I find that inserting the hook into only the front loop (one loop underneath hook, two loops on top) is neater. Crochet as you normally would until the end of the chain, making sure not to skip any stitches. To start the next row, you will need to add the necessary number of extra chains to the end of your row, then turn your work (so that you are working from right to left) and continue the process until you reach the end of your piece.

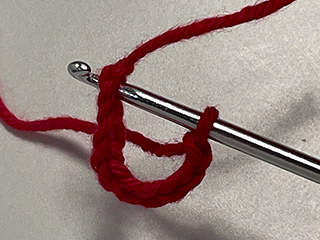
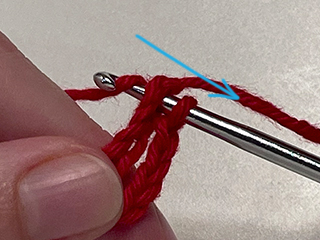
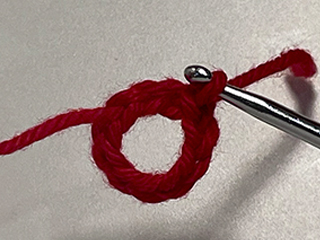
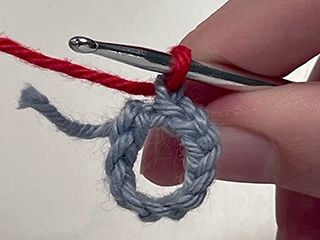
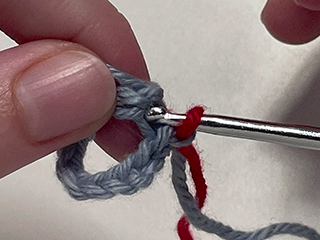
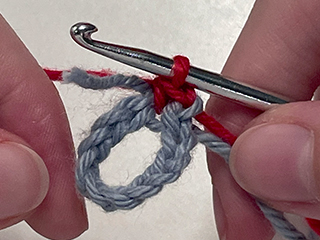
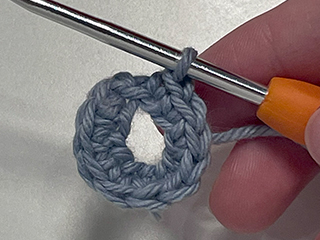
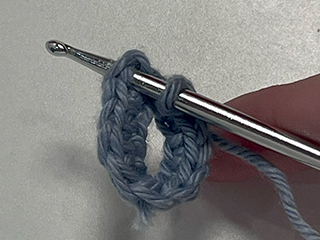
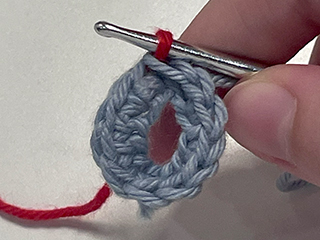
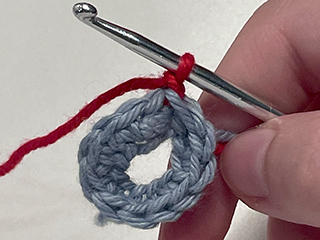
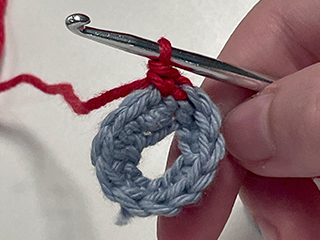
Chain Ring
To create the ring, make a straight chain with the desired amount of stitches. Once you reach the end, insert the hook into the very first chain, and make a slip stitch. Then add your extra chain(s), and continue crocheting around the chain. Once you get to the end of the row, slip stitch into the first stitch, add the extra chain(s), and continue like you would with the straight chain.
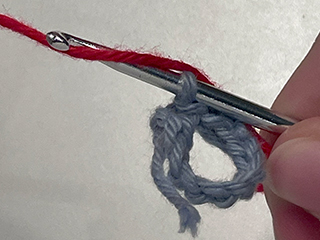
Crocheting into a chain ring is the same as crocheting into a straight chain, except you don't need to turn your work.
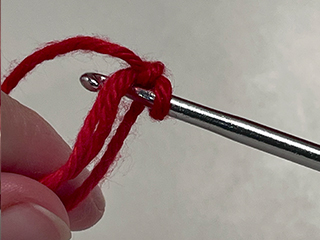
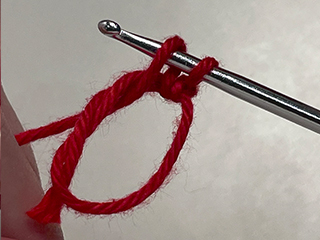
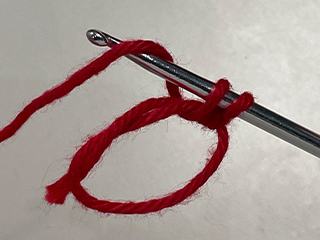
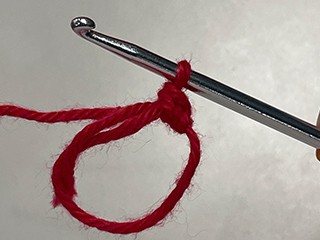
Crochet Around a Chain
This technique is used to create oval shaped pieces.
To crochet around a chain, start off like you would with a straight chain, stopping once you get to the end of the chain. Crochet into the last stitch three more times - there will be a total of four single crochet stitches in the last chain. Now you will be crocheting across the bottom of your stitches. Single crochet until you reach the end. Crochet into the last stitch once more, then slip stitch into the first sc.

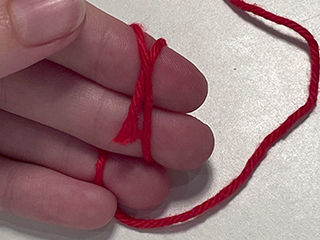
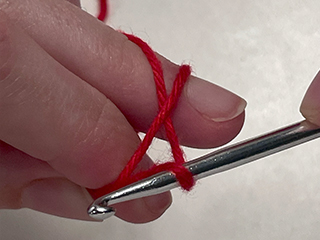
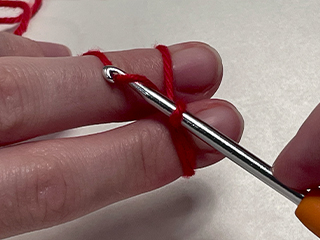
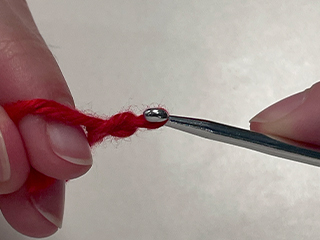
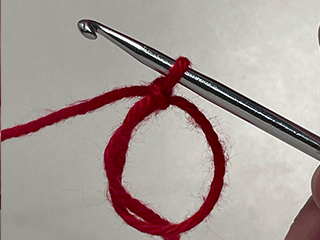
Magic Circle/Ring
Abbreviation: mc -or- mr
A magic ring is used to make round pieces. It is the foundation for every amigurumi project.
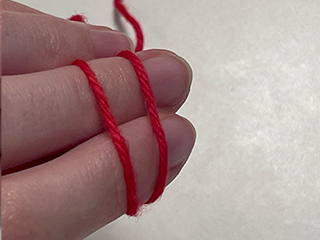
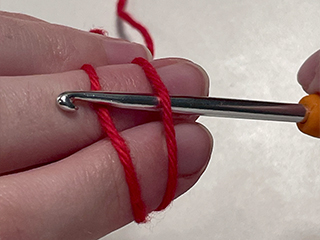
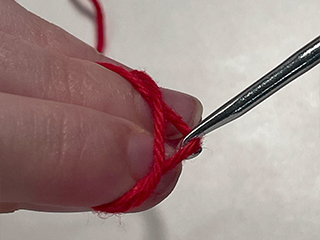
Start by wrapping the yarn around two fingers. There should be two loops of yarn on top of your fingers. Insert the hook under the first loop, and grab the second loop, pulling it under the first loop. Wrap the yarn over your hook, and pull it through the loop. You should have a ring of yarn with a loop on it. You can start crocheting from there. Pull the yarn tail to tighten the ring.

Finishing a Project
Tying Off
Tying off your work is super simple.
All you need to do is cut your yarn at the end of you project and pull the end through the last stitch. For a more secure finish, you might want to chain one before cutting your yarn. If there are more stitches infront of your final stitch (eg. you're working in rounds like in amigurumi), then you'll want to slip stitch into the next stitch before cutting the yarn. This flattens out your final stitch a bit to make your work a bit neater.
Closing a 3D Piece
When finishing of a closed 3D piece, like a sphere, you will need to sew the opening closed.
Tie off your yarn, then with a yarn needle, weave the yarn end through the last stitches around in a circle, then pull the yarn to tighten the hole closed.
Sewing Pieces Together
When a project is made of multiple pieces, the best way to connect them securely is by sewing.
When you tie off your work, you will need to make sure you have a long enough tail of yarn to sew with. Thread the yarn through a yarn needle, then sew using a ladder stitch between the pieces you want to connect.
Weaving in the Ends
Weaving in the loose ends of yarn on your project may seem tedious, but is essential to sercuring your work.
Using a yarn needle, thread the yarn inside your work. You don't want to weave in from one side, and out the other, the yarn ends shouldn't be visible once woven in. Then thread the yarn back through the same way, making sure not to insert the needle in the same place it came out from. For extra security, repeat on the next row over.